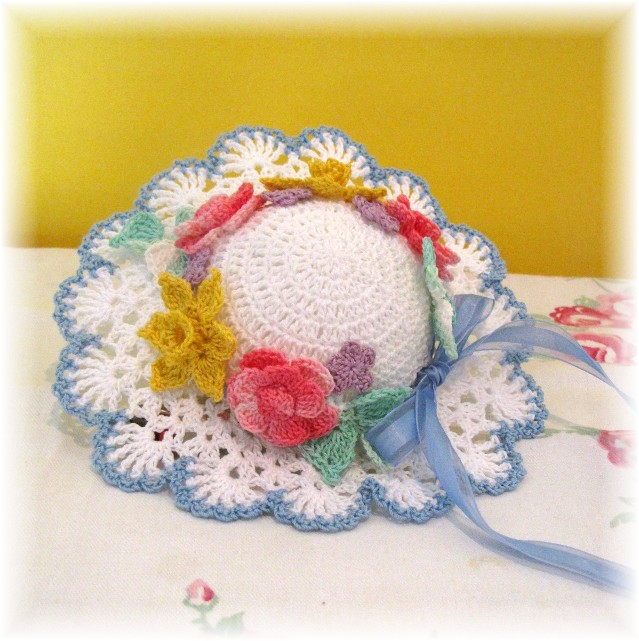
Hidden deep in an enchanted meadow, the Easter Bunny has a secret garden. A magical garden where he grows his most lovely and special Easter eggs. He has given me permission to re-create his garden in crochet, and share the pattern with you. We hope you will enjoy it!
Easter Garden Doily
By Elizabeth Ann White
For BellaCrochet
Size: Doily is about 13”
across. Flower Egg Holders hold a medium size egg.
Skill Level: Intermediate—for
those who are familiar with working with size 10 thread and steel hooks, and
who have a thorough understanding of the basics of crochet
Gauge: Rnds 1-5 of Doily are 2 ½”
across
Materials:
Size 10
Crochet Cotton Thread:
150 yards Shaded Greens for Doily and Leaves
50 yards each of 5 different colors for
Flower Egg Cups
25 yards each of 5 different colors for Roses
5
Artificial eggs
Heavy
Spray Starch
Glue
Size
7 (1.65mm) Steel Crochet Hook
Special Stitches:
For Beginning Small Shell (beg sm
shell): (Sl st, ch 3, dc, ch 2, 2 dc) in st or ch sp indicated
For
Small Shell (sm shell): (2 dc, ch 2,
2 dc) in st or ch sp indicated
For
Beginning Large Shell (beg lrg shell):
(Sl st, ch 3, 2 dc, ch 2, 3 dc) in st or ch sp indicated
For
Large Shell (lrg shell): (3 dc, ch
2, 3 dc) in st or ch sp indicated
Doily
Rnd 1: With shaded green
thread, ch 4, sl st in first ch to form ring, ch 3, 11 dc in ring,
join
with sl st in top of ch-3. (12 dc made)
Rnd 2: (Ch 3, dc) in first st,
2 dc in each st around, join. (24)
Rnd 3: (Ch 3, dc) in first st,
dc in next st, (2 dc in next st, dc in next st) around, join.
(36)
Rnd 4: (Ch 3, dc) in first st,
dc in each of next 2 sts, (2 dc in next st, dc in each of
next 2 sts) around, join. (48)
Rnd 5: (Ch 3, dc) in first st,
dc in each of next 3 sts, (2 dc in next st, dc in each of next
3 sts) around, join. (60)
Rnd 6: Ch 1, sc in first st, (ch 5, skip next st, sc in
next st) around to last st, ch 2, skip last st,
join with dc in first sc.
Rnds 7-10: Ch 1, sc in first ch
sp, (ch 5, sc in next ch sp) around, ch 2, join with dc in first sc.
Rnd 11: Beginning small shell (see
Special Stitches) in first ch sp, ch 1, (small shell—see Special
Stitches—ch 1) in each ch sp around, join with sl st in top of first ch-3. (30 small shells)
Rnd 12: Sl st to center of
first shell, beg sm shell in first shell, ch 1, (sm shell in next shell, ch 1)
around, join.
Rnds 13-14: Sl st to center of first
shell, beg sm shell in first shell, ch 2, (sm shell in next shell, ch 2)
around, join.
Rnds 15-16: Sl st to center of
first shell, beg lrg shell (see Special Stitches) in first shell,
ch 2, (lrg shell—see Special Stitches--in next shell, ch
2) around, join.
Rnd 17-18: Sl st to center of
first shell, beg lrg shell in first shell, ch 3, (lrg shell in next shell, ch
3) around, join.
Rnd 19: Sl st to center of
first shell, beg lrg shell in first shell, ch 4, (lrg shell in next shell, ch 4)
around, join.
Rnd 20: Sl st to center of
first lrg shell, beg lrg shell in first lrg shell, (ch 4, lrg shell in next
shell) around, ch 2, join with hdc in top of ch-3.
Rnd 21: Ch 1, sc in joining sp,
ch 1, (tr, ch 1) 9 times in ch-2 sp of next lrg shell, *sc in next ch-4 sp, ch
1, (tr, ch 1) 9 times in ch-2 sp of next lrg shell; repeat from * around, join
with sl st in first sc. (30 scallops
made)
Rnd 22: (Sl st, ch 1, sc) in
first ch 1 sp of first scallop, (ch 3, sc in next ch-1 sp) 9 times, *sc in
first ch-1 sp on next scallop, (ch 3, sc in next ch-1 sp) 9 times; repeat from
* around, join. Fasten off.
Flower Egg Holder (make 5 of different colors)
Rnd 1: Ch 4, 11 dc in 4th
ch from hook, join with sl st in top of ch-4. (First 3 chs count as first dc; 12 dc made)
Rnd 2: (Ch 3, dc) in first st,
2 dc in each st around, join with sl st in top of ch-3. (24 dc
made)
Rnd 3: Working this round in back lps only, ch 3, dc in each st
around, join.
Rnd 4: Beg sm shell in first
st, skip next 2 sts, (sm shell in next st, skip next 2 sts) around, join with
sl st in top of ch-3.
Rnd 5: Sl st in next st, beg
sm shell in next ch-2 sp, sm shell in ch-2 sp of each sm shell around, join.
Rnds 6-7: Sl st in next st, beg
sm shell in next ch-2 sp, ch 1, (sm shell in ch-2 sp of next sm shell, ch 1)
around, join with sl st in top of ch-3.
Rnd 8: Sl st in next st, beg
sm shell in next ch-2 sp, (ch 2, sm shell in ch-2 sp of next sm shell) around,
join with hdc in top of ch-3 to create joining sp.
Rnd 9: Ch 1, sc in joining sp,
ch 1, (dc in ch-2 sp of next sm shell, ch 1) 5 times, *sc in next ch-2 sp
between shells, ch 1, (dc in ch-2 sp of next sm shell, ch 1) 5 times; repeat
from * around, join with sl st in first sc. (8
scallops made)
Rnd 10: Ch 1, sc in next ch-1
sp, (ch 3, sc in next ch-1 sp) 5 times *sc in first ch-1 sp on next scallop,
(ch 3, sc in next ch-1 sp) 5 times; repeat from * around, join. Fasten off.
Base
Rnd 3: Working in remaining lps
of Rnd 2, join with sl st in first st, beg sm shell in same st as joining, (ch
2, skip next 2 sts, sm shell in next st) 7 times, join with hdc in top of ch-3
to create joining sp.
Rnd 4: Ch 1, sc in joining sp,
ch 1, (dc in ch-2 sp of next sm shell, ch 1) 5 times, *sc in next ch-2 sp, ch
1, (dc in ch-2 sp of next sm shell, ch 1) 5 times; repeat from * around, join
with sl st in first sc. (8 scallops made)
Rnd 5: Ch 1, sc in next ch-1
sp, (ch 3, sc in next ch-1 sp) 5 times *sc in first ch-1 sp on next scallop,
(ch 3, sc in next ch-1 sp) 5 times; repeat from * around, join. Fasten off.
Rose (make 5 of different colors)
Rnd
1: Ch 4, 9 dc in 4th ch from hook, join with sl st in top of ch-4. (10
dc made)
Rnd
2: Ch
1, sc in each st around, join with sl st in first sc.
Rnd 3: Ch 1, sc in first st, ch 2, skip
next st, (sc in next st, ch 2, skip next st) around, join with sl st in first
sc. (5 ch-2 sps)
Rnd
4: For petals,
(sl st, ch 2, 4 dc, ch 2, sl st) in each ch-2 sp around, join with sl st in
first sl st.
Rnd
5:
Working behind petals and only in skipped sts of Rnd 2, ch 1, sc
in first st, ch 4, (sc in next st, ch 4) around, join with sl st in first
sc. (5 ch-4 sps)
Rnd
6: For petals,
(sl st, ch 2, 6 dc, ch 2, sl st) in each ch-4 sp around, join with sl st in
first sl st. Fasten off.
Leaves (make 5)
With
shaded green, ch 6, sl st in first ch to form ring; ch 1, *2 sc in ring, ch 10,
in 6th ch from hook work (2 tr, ch 3, sl st in 3rd ch
from hook, 2 tr, ch 4, sl st), sl st in
remaining 4 chs of ch-10*; repeat between * and * 2 more times for a total of 3
leaves, join with sl st in first sc. Fasten off.
Finishing
1: Place doily on blocking
surface. Spray with heavy starch, shape and allow to dry.
2: Spray each Flower Egg
Holder with heavy starch, shape and allow to dry.
3: Glue one set of Leaves
to bottom of each Rose. Glue Leaves and Rose to top of an artificial egg. Allow
to dry.
4: Place one egg inside
each Flower Egg Holder. Place Flower Egg Holders evenly spaced around doily (Flower Egg Holders can be glued in
place if desired; I did not glue mine.)
Copyright BellaCrochet 2015. All rights reserved. Please do not share or redistribute this pattern. It is for personal use only. You may sell items made from this pattern, but not the pattern itself. DO NOT make videos or tutorials of it for distribution on YouTube or any other site.
This pattern has been tested for accuracy and clarity, and I can offer no additional information, photos or help with it.
Special thanks to the Easter Bunny's helpers and my wonderful testers, Jewel Fernley, Jolene Ortiz, E.J. Miller, and Rosina Smith!
Happy Easter!
If you have enjoyed this pattern, I hope you will check out all my other free patterns: