Friday, September 08, 2017

Belle In The Rose Garden: A Free Crinoline Lady Crochet Pattern


Belle In The Rose Garden 
by Elizabeth Ann White

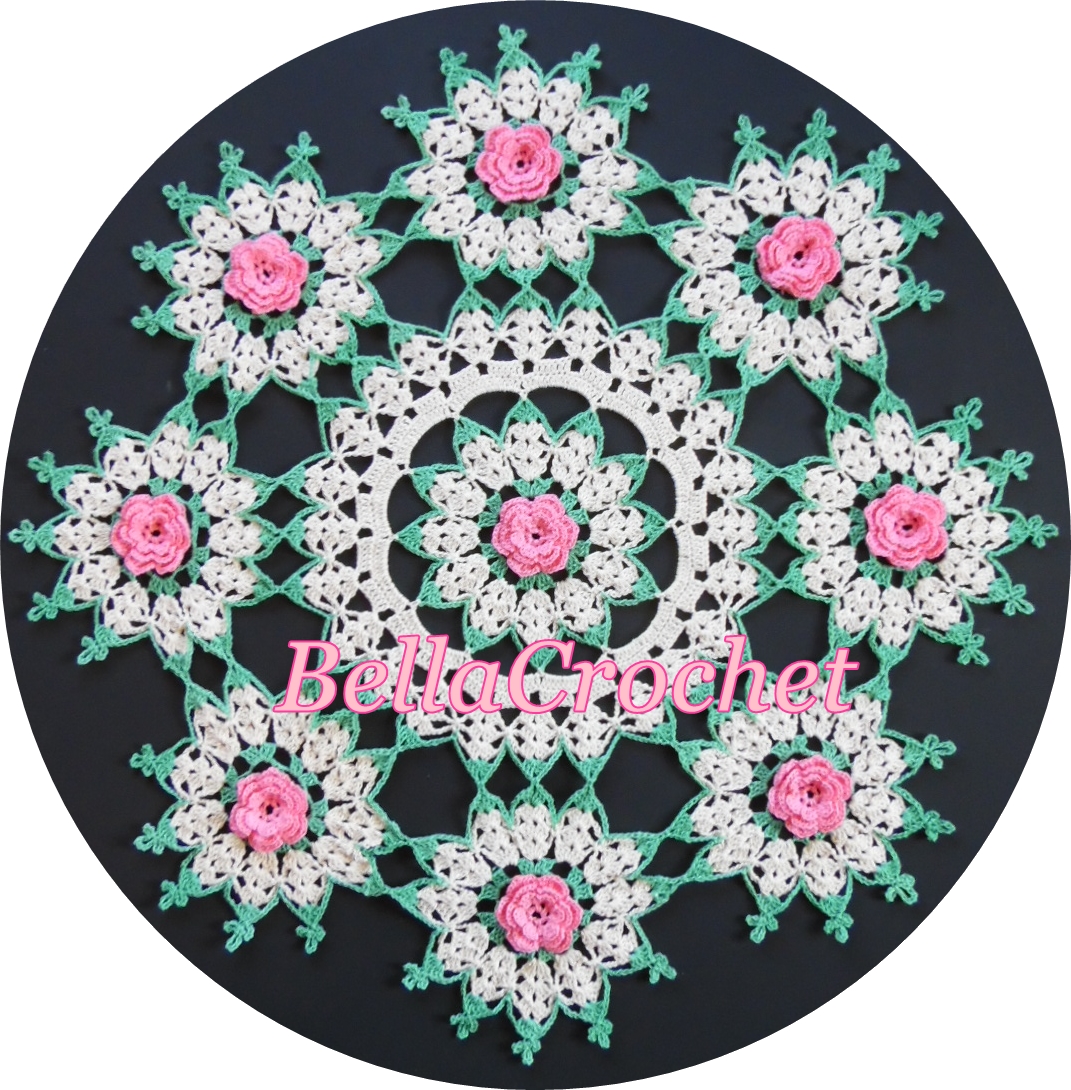
Size: About 13” across by 15” tall 

Skill Level: Intermediate- for those who are familiar with working with size 10 thread and steel hooks, and who have a thorough understanding of the basics of crochet

Materials: 
Size 10 Crochet Cotton Thread:  
200 yds. Light Green    
150 yds. Rose  
50 yds.  each Pink, Shaded Pinks and Medium Green  
25 yds. each Yellow and  Peach 
Heavy Spray Starch 
Fabric Glue  
Size 7 (1.65mm) steel hook 

Special Stitches:  
For 3 dc cluster: Yo, insert hook in st or ch sp indicated, yo, pull lp through, yo, pull through 2 lps on hook, (yo, insert hook in same st or ch sp, yo, pull through, yo, pull through 2 lps on hook) 2 times, yo, pull through all 4 lps on hook 
For Shell:  (2 dc, ch 2, 2 dc) in st or ch sp indicated 
For Large Shell (lrg shell):  (3 dc, ch 2, 3 dc) in st or ch sp indicated 
For Double Shell:  (2 dc, ch 2, 2 dc, ch 2, 2 dc) in stitch or ch sp indicated 
For 2 tr cluster:  (yo 2 times, insert hook in st or sp indicated, yo, pull lp through, yo, work off 2 lps, yo, work off next 2 lps) 2 times, yo, pull through  all 3 lps on hook 

Background 
Rnd 1: For Eyelet Foundation (see Eyelet Tutorial), with lt. green, (ch 3, dc in third ch from hook) 56 times; being careful not to twist Foundation, join with sl st in first ch of first ch-3 to form a ring of 56 ch sps; working in ch sps of Foundation, (sl st, ch 3, dc, ch 2, 2 dc) in first ch sp (beginning shell made), ch 3, skip next ch sp, (shell –see Special Stitches- in next ch sp, ch 3, skip next ch sp) around, join with sl st in top of ch-3 of beginning shell. (28 shells, 28 ch-3 sps made) 

Rnd 2: Sl st in next st, (sl st, ch 3, dc, ch 2, 2 dc) in ch-2 sp of first shell, ch 3, skip next ch-3 sp, 6 dc in ch-2 sp of next shell, ch 3, skip next ch-3 sp, *shell in ch-2 sp of next shell, ch 3, skip next ch-3 sp, 6 dc in ch-2 sp of next shell, ch 3, skip next ch-3 sp; repeat from * around, join with sl st in top of ch-3.     

Rnd 3: Sl st in next st, (sl st, ch 3, dc, ch 2, 2 dc) in ch-2 sp of first shell, ch 3, skip next ch-3 sp, dc in next dc, (ch 1, dc in next dc) 5 times, ch 3, skip next ch-3 sp, *shell in ch-2 sp of next shell, ch 3, skip next ch-3 sp, dc in next dc, (ch 1, dc in next dc) 5 times, ch 3, skip next ch-3 sp; repeat from * around, join.  

Rnd 4: Sl st in next st, (sl st, ch 3, dc, ch 2, 2 dc) in ch-2 sp of first shell, ch 3, skip next ch-3 sp, (sc in next ch-1 sp, ch 3) 5 times, skip next ch-3 sp, *shell in ch-2 sp of next shell, ch 3, skip next ch-3 sp, (sc in next ch-1 sp, ch 3) 5 times, skip next ch-3 sp; repeat from * around, join.  

Rnd 5: Sl st in next st, (sl st, ch 3, dc, ch 2, 2 dc, ch 2, 2 dc) in ch-2 sp of first shell, ch 3, skip next ch-3 sp, (sc in next ch-3 sp, ch 3) 4 times, skip next ch-3 sp, *double shell (see Special Stitches) in ch-2 sp of next shell, ch 3, skip next ch-3 sp, (sc in next ch-3 sp, ch 3) 4 times, skip next ch-3 sp; repeat from * around, join.  

Row 6: For First Pineapple Point, sl st across to second ch-2 sp of first double shell, (sl st, ch 3, dc, ch 2, 2 dc) in second ch-2 sp of first double shell, ch 3, skip next ch-3 sp, (sc in next ch-3 sp, ch 3) 3 times, skip next ch-3 sp, shell in first ch-2 sp of next double shell; leaving remaining stitches unworked, turn. 

Row 7: Ch 3, shell in ch-2 sp of first shell, ch 3, skip next ch-3 sp, (sc in next ch-3 sp, ch 3) 2 times, skip next ch-3 sp, shell in last shell, turn.  

Row 8: Ch 3, shell in ch-2 sp of first shell, ch 3, skip next ch-3 sp, sc in next ch-3 sp, ch 3, skip next ch-3 sp, shell in ch-2 sp of last shell, turn. 

Row 9: Ch 3, shell in ch-2 sp of first shell, skip next ch-3, skip next sc, skip next ch-3 , shell in ch-2 sp of last shell, turn.    

Row 10: Ch 3, 3 dc cluster (see Special Stitches) in ch-2 sp of first shell, ch 6, sl st in 6th ch from hook, ch 7, sl st in same ch last sl st was worked in, ch 5, sl st in same ch last sl st was worked in, 3 dc cluster in ch-2 sp of last shell, ch 3, sl st in last st of last shell. Fasten off. 

Row 6: For Next Pineapple Point, join lt green with sl st in remaining ch-2 sp of last worked double shell, (ch 3, dc, ch 2, 2 dc) in same sp as joining, ch 3, skip next ch-3 sp, (sc in next ch-3 sp, ch 3) 3 times, skip next ch-3 sp, shell in first ch-2 sp of next double shell; leaving any remaining stitches unworked, turn. 

Rows 7-10: Repeat Rows 7-10 of First Pineapple Point.    

For remaining pineapple points, repeat Next Pineapple Point around for a total of 14 pineapple points. 

Rose (make 15) 
With shaded pink, *ch 3, (hdc, ch 3, sl st) in third ch from hook*; repeat between ** 7 more times. Fasten off. (8 petals made) 

Rose Leaves (make 15) 
With med. green, for first leaf, ch 4, [3 dc cluster -see Special Stitches-in 4th ch from hook, ch 3, sl st in 3rd ch from hook (tip of leaf made), ch 3, sl st same ch  last 3-dc cl was worked in], ch 6; for second leaf, repeat between [ ]; fasten off. 

Belle 
Head, Bodice and Skirt 
Row 1: Starting at Head, with peach, ch 4, 4 dc in 4th ch from hook, turn. (5 dc made) 

Row 2: (Ch 3, dc) in first st, dc in each st across to last st, 2 dc in last st, turn. (7) 

Row 3: Ch 2 (not worked in or counted as st), dc in next 4 sts, dc last 2 sts tog, turn. (5) 

Row 4: Ch 2, dc in next 2 sts, dc last 2 sts tog, turn. (3) 

Row 5: Ch 3, dc in each st across, turn. 

Row 6: (Ch 3, 2 dc) in first st, dc in next st, 3 dc in last st, turn. (7) 

Row 7: (Ch 3, dc) in first st, 2 dc in each st across, turn. Fasten off. (14) 

Row 8: For Bodice, working this row in back lps only, skip first 3 sts, join rose with sl st in next st, ch 3, dc in next 7 sts; leaving remaining sts unworked, turn. (8) 

Row 9: Ch 2, dc in next 5 sts, dc last 2 sts tog, turn. (6) 

Row 10: Ch 3, dc in each st across, turn.  

Row 11: For Skirt, (ch 3, dc) in first st, 2 dc  in each st across, turn. (12) 

Row 12: (Ch 3, dc) in first st, (dc in next st, 2 dc in next st) 2 times, dc in each of next 2 sts, 2 dc in next st, (dc in next st, 2 dc in next st) 2 times, turn. (18) 

Row 13: (Ch 3, dc) in first st, dc in each of next 2 sts, (2 dc in next st, dc in each of next 2 sts) across to last 3 sts, 2 dc in next st, dc in next st, 2 dc in last st, turn. (25) 

Row 14: (Ch 3, dc, ch 2, 2 dc)  in first st, (skip next 3 sts, shell-see Special Stitches- in next st) across, turn. (7 shells) 

Row 15: Ch 3, shell in ch-2 sp of each shell across, turn. 

Rows 16 & 17: Ch 3, shell in ch-2 sp of  first shell, (ch 1, shell in ch-2 sp of next shell) across, turn.  

Rows 18 &19: Ch 3, shell in ch-2 sp of  first shell, (ch 2,  shell in ch-2 sp of next shell) across, turn. 

Rows 20 & 21: Ch 3, large shell (see Special Stitches) in ch-2 sp of first shell, (ch 2, lrg shell in ch-2 sp of next shell) across, turn.  

Rows 22-27: Ch 3, lrg shell in ch-2 sp sp of first lrg shell, (ch 3, lrg shell in ch-2 sp of next lrg shell) across, turn. 

Row 28: Ch 3, lrg shell in ch-2 sp of first lrg shell, (ch 3, lrg shell in  ch-2 sp 
of next lrg shell) across, dc in last st of last shell, do not turn. Fasten off.  

Row 29: Join pink with sc in first st, ch 1, (tr, ch 1) 7 times in ch-2 sp of first shell, *sc in next ch-3 sp between shells, ch 1, (tr, ch 1) 7 times in ch-2 sp of next shell; repeat from * across, sc in last st, Fasten off. Do not turn. (7 scallops made) 

Row 30: Join rose with sc in first ch-1 sp, (ch 3, sc in next ch-1 sp) 7 times, *sc in next ch-1 sp (the first ch-1 sp on next scallop), (ch 3, sc in next ch-1 sp) 7 times; repeat from * across. Fasten off. 

Bodice Ruffle 
Row 1: Working in unworked sts and remaining front lps on Row 7, join rose with sc in first st, (ch 3, sc in next st) across, turn. 

Row 2: Sl st to center of first ch sp, (ch 1, sc) in first ch sp, (ch 3, sc in next ch sp) across. Fasten off. 

Arm (make 2) 
Row 1: With peach, starting at hand, ch 3, 2 dc in 3rd ch from hook, turn. (3 dc made) 

Row 2: Ch 3, dc next 2 sts tog, turn. (2) 

Row 3: (Ch 3, dc) in first st, dc in next st, turn. (3) 

Rows 4-6: Ch 3, dc in each st across, turn.  

Row 7: (Ch 3, dc) in first st, dc in each st across, turn. (4) 

Rows 8-10: Ch 3, dc in each st across, turn. At end of last row, fasten off.  

Hair 
With yellow, ch 4, 2 tr cluster (see Special Stitches) in 4th ch from hook, ch 2, 2 dc cluster in 2nd ch from hook, ch 4, 2 tr cluster in 4th ch from hook, ch 16, 3 sc in second ch from hook, 3 sc in each ch across, sl st in tip of last 2-tr cluster made. Fasten off. 
For bangs, working around post of last st of 2-dc cluster, join with sc, (ch 3, sc) 3 times around same st. Fasten off. 

Fan 
Row 1: With rose, ch 4, 4 dc in 4th ch from hook, turn. (5) 

Row 2: (Ch 3, dc) in first st, (dc in next st, 2 dc in next st) 2 times, turn. (8) 

Row 3: Ch 1, sc in first st, (ch 3, sc in next st) across. Fasten off.  


Finishing and Assembly Notes: 
When gluing items, it is helpful to place a drop of glue on the tip of a toothpick; use the toothpick to precisely apply glue to desired spot. Use photos as a guide to positioning all pieces.  I have also found it helpful to make an assembly board by covering a sturdy sheet of cardboard with clear plastic wrap.   Glue will not adhere to the plastic wrap, and items can be assembled and left on it to dry. After items have been starched and dried, I move them from the blocking surface to the assembly board for gluing and final assembly.  

1: For each Rose, roll petals to form a rose shape. Glue base of Rose to hold petals in place. Allow to dry. 
2: Glue one set of Leaves to base of each Rose.  
3: Place Head, Bodice and Skirt on blocking surface (I use a large sheet of cardboard covered with white fabric.) Spray with starch. Shape Skirt and Bodice Ruffle. Allow to dry.  
4: Glue Hair to Head. Allow to dry. 
5: Glue Arms under Bodice Ruffle. Place Fan over Head and glue in place. Shape Arms and glue hands to hold in place. 
6: Place Background on blocking surface. Place assembled Belle on Background. Shape as shown in photo,  spray with starch and allow to dry.  
7: Glue Belle to Background. Allow to dry.  
8: Glue one Rose and one set of Leaves to each pineapple point as shown. Glue remaining Rose and set of Leaves to Belle’s hand. Allow to dry. 


Special thanks go to E. J. Miller, Jolene Ortiz, Jewel Fernley, and Karen Misiunas   for testing this pattern.

Copyright BellaCrochet 2014. All rights reserved. Please do not redistribute or share this pattern; do not post it (or any portion of it) on any website. DO NOT make videos or tutorials of it for distribution on YouTube or any other site. You may share the link to the pattern only (and link shares are greatly appreciated, please tell your crocheting friends who might enjoy this pattern!) This pattern has been tested for accuracy and clarity, and I can offer no additional information, photos or help with it.

If you have enjoyed this design, I hope you will check out all my other free patterns:


Friday, September 01, 2017

Rose Garden Centerpiece: A Free Crochet Pattern For You


Rose Garden Centerpiece
By Elizabeth Ann White

Size: About 21” across 


Skill Level: Intermediate- for those who are familiar with working with size 10 thread and steel hooks, and who have a thorough understanding of the basics of crochet

Special Stitches:
For beginning shell (beg shell): (ch 3, 2 dc, ch 2, 3 dc) in  ch sp indicated 
For shell: (3 dc, ch 2, 3 dc) in  ch sp indicated
For Joining Shell (J-shell): work 3 dc in ch-2 sp of shell indicated, ch 1, sl st in ch-2 sp of shell indicated (the shell you are  joining to), ch 1, work 3 more dc in same ch-2 sp  that the last 3 dc were worked in to complete shell
For picot shell: (3 dc, ch 6, sl st in 6th ch from hook, ch 7, sl st in same ch last sl st was worked in, ch 5, sl st in same ch last sl st was worked in, 3 dc) in ch sp indicated

Materials: 
Size 10 Cotton Crochet Thread:
150 yards Cream
50 yards each Rose and Green
Strand of contrasting color thread or stitch marker (I used a short strand of red thread)
Heavy Spray Starch 
Stainless steel pins for blocking
Size 7 (1.65mm) steel hook 

Doily
Rnd 1: With  Rose, ch 6, sl st in first ch to form ring; ch 1, (sc in ring, ch 2) 6 times, join with sl st in first sc. (6 ch-2 sps made)

Rnd 2: Ch 1, (sc, ch 1, 3 dc, ch 1, sc) in each ch-2 sp around, join. (6 petals made)

Rnd 3: Working behind petals, ch 3, (sl st between next 2 petals, ch 3) around, join with sl st in first ch of beg ch-3

Rnd 4: Ch 1, (sc, ch 1, 5 dc, ch 1, sc) in each ch-3 sp around, join with sl st in first sc.

Rnd 5: Working behind petals, ch 4, (sl st between next 2 petals, ch 4) around, join with sl st in first ch of beg ch-4.

Rnd 6: Ch 1, (sc, ch 1, 3 dc, tr, 3 dc, ch 1, sc) in each ch-4 sp around, join with sl st in first sc.

Rnd 7: Working behind petals, ch 5, (sl st between next 2 petals, ch 5) around, join with sl st in first ch of beg ch-5. Fasten off.

Rnd 8: Join Green with sc in first ch-5 sp, ch 6, (sc in next ch-5 sp, ch 6) around, join with sl st in first sc.

Rnd 9: (Sl st, beg shell—see Special Stitches-- in first ch-6 sp), ch 4, *shell (see Special Stitches) in next ch-6 sp, ch 4; repeat from * around, join with sl st in top of ch-3. Fasten off. (6 shells, 6 ch-4 sps made)

Rnd 10: Join Cream with sl st in ch-2 sp of first shell, beg shell in same sp as joining, ch 5, shell in next ch-4 sp, ch 5, (shell in ch-2 sp of next shell, ch 5, shell in next ch-4 sp, ch 5) around, join with sl st in top of ch-3. (12 shells, 12 ch-5 sps made)

Rnd 11: Sl st in next 2 dc, (sl st, beg shell) in ch-2 sp of first shell, ch 3, (skip next ch-5 sp, shell in ch-2 sp of next shell, ch 3) around, join with sl st in top of ch-3.

Note: To sc around rnds of previous 2 rnds, insert hook under the next ch sp on the rnd 2 rnds below, yo, pull lp through; working over both ch sps as one, complete sc as usual.

Rnd 12: Sl st in next 2 dc, (sl st, beg shell) in ch-2 sp of first shell, ch 4, sc around ch sps of previous 2 rnds (see Note above), ch 4, *shell in ch-2 sp of next shell, ch 4, sc around ch sps of previous 2 rnds, ch 4; repeat from * around, join with sl st in top of ch-3. Fasten off.

Rnd 13: Join Green with sl st in ch-2 sp of first shell, beg shell in same sp as joining, ch 5, sc in next sc, ch 5, (shell in ch-2 sp of next shell, ch 5, sc in next sc, ch 5) around, join with sl st in top of ch-3. Fasten off.

Rnd 14: Join Cream with sc in ch-2 sp of first shell, ch 12, (sc in ch-2 sp of next shell, ch 12) around, join with sl st in first sc.

Rnd 15: (Sl st, ch 3, 15 dc) in first ch-12 sp, work 16 dc in each ch-12 sp around, join with sl st in top of ch-3.

Rnd 16: Ch 3, dc in each of next 5 dc, (ch 3, skip next 2 dc, dc in each of next 6 dc) around, skip last 2 dc, join with dc in top of ch-3 to create joining sp.

Rnd 17: (Sl st, beg shell) in joining sp, ch 5, (shell in next ch-3 sp, ch 5) around, join with sl st in top of ch-3.

Rnd 18: Sl st in next 2 dc, (sl st, beg shell) in ch-2 sp of first shell, ch 5, (shell in ch-2 sp of next shell, ch 5) around, join with sl st in top of ch-3.

Rnd 19: Sl st in next 2 dc, (sl st, beg shell) in ch-2 sp of first shell, ch 4, sc around ch sps of previous 2 rnds, ch 4, *shell in ch-2 sp of next shell, ch 4, sc around ch sps of previous 2 rnds, ch 4; repeat from * around, join with sl st in top of ch-3. Fasten off.

Rnd 20: Join Green with sl st in ch-2 sp of first shell, beg shell in same sp as joining, ch 5, sc in next sc, ch 5, (shell in ch-2 sp of next shell, ch 5, sc in next sc, ch 5) around, join with sl st in top of ch-3. Fasten off.


A Note about joining the Motifs: I struggled to make the instructions for the joinings as easy to understand as possible, but sometimes pictures speak louder than words. I have included several photos, which I hope will give a clear picture of how the joinings are done. When joining one Motif to the doily or to another Motif, all you are basically doing is making a regular shell, but instead of the ch-2 at the center, you will be working a ch-1, then slip stitching into the ch-2 sp of the shell you are joining to, then working another ch-1 and then completing the shell as usual.) You will do the same thing on the first shell of each round, except you will be using a beginning shell.

First Motif:
Rnds 1-12: Repeat Rnds 1-12 of Doily.
For Rnd 13 work steps A-H:
Rnd 13:
Note: When joining Motifs to Doily, hold wrong sides of pieces together
A: Join Green with sl st in ch-2 sp of first shell, beg shell in same sp as joining, ch 5, sc in next sc, ch 5, shell in ch-2 sp of next shell, ch 5, sc in next sc, ch 5;

B: Work J-shell (see Special Stitches) in next shell placing sl st in first shell on Rnd 20 of Doily (see Photo A) ch 5, sc in next sc, ch 5;

C: Work J-shell in next shell placing sl st in next shell on Rnd 20 of Doily, ch 5, sc in next sc, ch 5;

D: Repeat Step C (see Photo B);

E: Shell in ch-2 sp of next shell, ch 5, sc in next sc, ch 5;

F: Shell in ch-2 sp of next shell (mark this shell), ch 5, sc in next sc, ch 5;

G: Picot shell (see Special Stitches) in ch-2 sp of next shell, ch 5, sc in next sc, ch 5;

H: Repeat Step G 4 more times,   join with sl st in top of ch-3. Fasten off. (see Photo C)

Photo A: Joining First Motif to Doily
Photo B: First Motif joined to Doily
Photo C: First Motif completed. A strand of red thread is used as a marker.  

Next Motif
Notes: When joining Motifs and Doily, hold wrong sides of pieces together.
For Beginning J-shell: work (ch 3, 2 dc) in ch-2 sp of shell indicated, ch 1, sl st in ch-2 sp of shell indicated (the shell you are joining to), ch 1, then work 3 more dc in same place last 3 dc were worked to complete shell

Rnds 1-12: Repeat Rnds 1-12 of Doily.
For Rnd 13 work steps A-H:
Rnd 13:
A: Join Green with sl st in ch-2 sp of first shell, work beginning J-shell (see Notes above) in first shell of this Motif placing sl st in marked shell on last Motif made (see Photo D); ch 5, sc in next sc, ch 5;

B: Work J-shell in next shell on this Motif placing sl st in next unworked shell on last Motif made, ch 5, sc in next sc, ch 5;

C: Work J-shell in next shell on this Motif placing sl st in next shell on Rnd 20 of Doily, ch 5, sc in next sc, ch 5;

D: Repeat Step C 2 more times (see Photo E);

E: Shell in ch-2 sp of next shell on this Motif, ch 5, sc in next sc, ch 5;

F: Shell in ch-2 sp of next shell on this Motif (mark this shell), ch 5, sc in next sc, ch 5;

G: Picot shell in ch-2 sp of next shell, ch 5, sc in next sc, ch 5;

H: Repeat Step G 4 more times, join with sl st in top of ch-3. Fasten off.

Repeat Next Motif 5 more times for a total of 7 Motifs.

Photo D: Joining Second Motif to marked shell of first Motif

Photo E: Joining second Motif to first Motif and Doily

First and Second Motifs completed 
and shell marked on Second Motif with a strand of red thread

Last Motif
Note: When joining Motif and Doily, hold wrong sides of pieces together.
For Beginning J-shell: work (ch 3, 2 dc) in ch-2 sp of shell indicated, ch 1, sl st in ch-2 sp of shell indicated (the shell you are joining to), ch 1, then work 3 more dc in same place last 3 dc were worked to complete shell

Rnds 1-12: Repeat Rnds 1-12 of Doily.
For Rnd 13 work steps A-H:
Rnd 13:
A: Join Green with sl st in ch-2 sp of first shell, work Beginning J-shell in first shell of this Motif placing sl st in marked shell on last Motif made, ch 5, sc in next sc, ch 5;

B: Work J-shell in next shell on this Motif placing sl st in next unworked shell on last Motif made, ch 5, sc in next sc, ch 5;

C: Work J-shell in next shell of this Motif placing sl st in next shell on Rnd 20 of Doily, ch 5, sc in next sc, ch 5;

D: Repeat Step C 2 more times;

E: Work J-shell in next shell on this Motif placing sl st in corresponding shell on First Motif, ch 5, sc in next sc, ch 5;

F: Work J-shell in next shell on this Motif placing sl st in last unworked shell on First Motif, ch 5, sc in next sc, ch 5;

G: Picot shell in ch-2 sp of next shell, ch 5, sc in next sc, ch 5;

H: Repeat Step G 4 more times, join with sl st in top of ch-3. Fasten off.

Finishing
NOTE: Completed doily may not lay flat until blocked.
Place completed doily on blocking board. Spray with fabric spray. Shape as desired, pinning with stainless steel rust-proof pins if desired. Allow to dry.


Special thanks go to my wonderful testers, Jolene Ortiz, Carolyn Hirning-Edelen,
Debbie Mangan, and Sherry Sears. Thank you so much Ladies, for all your help and input, especially on how to make the joinings clearer and easier to understand. I don't know what I would do without you!


Update: If you would like to purchase an ad-free copy of this pattern for a small fee, please visit my Etsy shop:  Rose Garden

I am offering a paid version of this pattern for the convenience of  my customers who prefer an easy to read, printable and ad-free PDF. You will be able to easily save the pattern to your Etsy account as well as your computer or other device.

If you have enjoyed this design, I hope you will check out all my other free patterns:


Copyright BellaCrochet 2017. All rights reserved. Please do not redistribute or share this pattern; do not post it (or any portion of it) on any website. DO NOT make videos or tutorials of it for distribution on YouTube or any other site. You may share the link to the pattern only (and link shares are greatly appreciated, please tell your crocheting friends who might enjoy this pattern!) This pattern has been tested for accuracy and clarity, and I can offer no additional information, photos or help with it.