Friday, February 25, 2011

Vintage Crochet

I love old doilies. If they have pink roses, I love them even more.
Today, I would like to share a few favorite pieces from my collection of vintage crochet with you. These are all items that I purchased at antique stores, so I do not have patterns for any of them.
This doily is worked with tiny,  tiny thread. It looks smaller than some size 30 that I compared it to, but it is a little thicker than sewing thread.

And I love this sweet little doll, too. She is wearing such a pretty  little dress with a petticoat underneath, and a dainty pearl necklace. I wonder if she was made for a little girl to play with,  or maybe she was intended to be displayed on a lady's dresser. 

This doily is one of my all time favorites. The roses are made of individually crocheted petals that have been sewn together to form each rose. I am going to try making some like this soon.

So beautiful.
I always wonder about the person who made these beautiful old items. How long did it take them to make it? Was it a gift for someone special?  How did it wind up in a bin full of old linens in an antique shop in Gladewater, Texas?

Do you have any special old crochet pieces you would like to share photos of? Maybe something your mother or grandmother made? A piece with a special story? I would love to hear about it! You can contact me at:
Have a lovely weekend!

Tuesday, February 22, 2011

Writing a Workable Crochet Pattern Part Five: Testers

You've heard the saying "two heads are better than one." This is especially true when it comes to crochet patterns; my testers often find things that I simply overlook. I always read through each pattern several times, but sometimes, I just do not see a mistake or typo. And at times  instructions that seem perfectly clear to me will be incomprehensible to someone else. I now have 3 different crocheters test each one of my patterns, in the hope that if one doesn't catch something, another one will, and this is often the case.
I never expect my testers to fix any problems they may find in one of my patterns. If they believe they have found an error, or if anything is not clear to them, they notify me.  I then check the pattern and make any corrections or revisions, and send the corrected instructions back to the tester. They let me know when they have finished a pattern, and often send me pictures of their finished items.
Here is the actual check list I give to all of my testers:
Check List for BellaCrochet Patterns
Skill Level:
Most of my patterns are rated Intermediate, but I usually do not list this in the actual pattern.
Do you agree with the skill level (if listed,) or do you think it is harder or easier? If you have done any of my patterns in the past, do you think this one is significantly harder or easier than others (should I give it a different skill level than Intermediate?)

Size:
Did your item turn out the size listed?

Gauge:
NOTE: I do not give gauge on my thread patterns, as I find it is too hard to give an accurate one, and it is not critical on most of the things I design.
If given (and it usually is not!) is it correct?
If no gauge is given, do you think it needs one?

Materials list:
Is everything you need to make the item listed?
Does it look like there is too much or not enough of a certain color of thread?
Are there things listed you do not need?

Special Stitches:
Are instructions for all Special Stitches used in the pattern given?
Are there Special Stitches listed that are not used in the pattern?
Do you understand how to make the stitch from the instructions?

Pattern:
Is there a pattern for each piece of the item?
If making more than one of an item (roses, leaves, etc.), does the pattern tell you to make the correct amount?
Does each pattern tell you what color of thread to use, and is it the correct color?
Are all the rows/rnds numbered correctly?
Does it say to “turn” at the ends of the rows (if needed)?
Does it tell you to “fasten off” at the end of the last row/rnd?
Do all the repeats work correctly?
Are all * and ( ) included and in the proper position?
Is there anything extra, or weird, like a “fasten off” when you are not changing colors or at the end of the piece?
Is the pattern clear; do you understand what it is telling you to do?
If there are pictures, can you easily see what they are trying to illustrate? Do you think they help make the pattern easier to understand?
Do you see any spelling mistakes? Typos?

PLEASE DO NOT FEEL THAT YOU MUST FIND SOMETHING TO REPORT TO ME. Nothing makes me so happy as getting a report that no errors were found!

Finishing:
Are the finishing instructions clear?
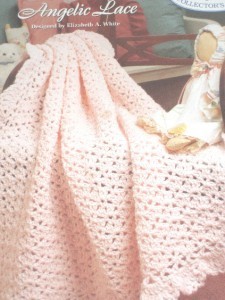
Did your item turn out like the one in the photograph by following the instructions?
Do you need more information on a certain step?

I cannot believe that I only started using testers in 2009. Before that, I agonized over each pattern, and for weeks after each was released I lived in fear of someone finding an error. My testers have given me not only much better and more accurate patterns, but peace of mind. I appreciate them more than I can say!

Wednesday, February 16, 2011

Writing a Workable Crochet Pattern Part Four: Doing the Math

When I worked in the technical editing department of Annie's Attic there was a dear lady (also a tech editor) who was fond of  picking up a beautiful doily or afghan and saying "It is just math; you just need to make the numbers work. That's all there is to it." As a designer this always bugged me. I felt that the stitch pattern, the type of thread or yarn used,  the proportions of the design, and even the color palette were all important elements to creating a beautiful design. I didn't like to hear what I considered a work of art described in such a matter-of-fact way. But I have to admit, when it comes to writing a pattern, she had a good point.
Math was never my favorite subject in school, but I use it every time I write a pattern. In order to write an accurate pattern, the numbers must add up. The stitches of one row are worked into the stitches of the row below, and form the base for the stitches of the following row. If one row of a pattern is off, it throws the whole pattern off.
Here is an example of how it works, and as in previous posts, the pattern is written in black and my comments are in red. Also, this pattern doesn't really make anything, it is for illustrative purposes only:

Row 1: Ch 12, dc in 4th ch from hook, dc in each ch across. (First 3 chs count as first dc; 10 dc made) Okay so far.
Row 2: Ch 3 for first dc, dc in each of next 3 sts, ch 2, skip next 3 sts, dc in each of last  4 sts. You only have 10 sts on the previous row, yet these instructions tell you to work in  or skip a total of 11 sts. (1+3+3+4=11) There are many possible ways to correct this: only skip 2 sts, only dc in the last 3 sts, etc. But only the designer knows for sure what is really supposed to happen.
Another example:
Row 1: Ch 12, dc in 4th ch from hook, dc in each ch across. (First 3 chs count as first dc; 10 dc made)
Okay so far.
Row 2: Ch 3, (skip next st, 3 dc in next st) 4 times, turn. In this example,  you have an extra stitch left over after you complete the all the repeats. [1+ (2x4) = 9] Is it meant to be left unworked, or is it a mistake? No one wants to have to guess!
These are just brief examples of what goes on in a pattern, but they illustrate the fact that it is important to count each st of each and every row or round. Stitch counts help keep track of where you are in a pattern, and I often chart out the stitches just to make sure that my math works. And again, my best advice would be to write down every thing you do as you are actually making the item. Errors are much less likely to occur when the numbers are fresh in your mind.
And the next post will be on another way I have found to make sure that patterns accurate; having them tested.

Sunday, February 13, 2011

Happy Valentine's Day

Happy Valentine's Day, Sweetie Pie!

Saturday, February 05, 2011

Afghans

While I tend to think of myself as a threadie, in reality I have probably had as many yarn projects published as I have thread. For several years, I designed an afghan or blanket almost every month. I did all the work myself (many designers used stitchers) so one a month was actually pretty good, considering I was also working full time, raising my family and turning out other designs as well. I liked to design afghans because they were easy; I could get the design established, then I didn't have to think too hard about them. Here are a few that I had published in the 90's:
I gave this one to my step-mom, Sheila.

I am not sure what happened to this one. I think I donated it to some organization to  be raffled off, but I don't remember anything else about it!


I made this one for my niece; it is still one of my favorite designs. So sweet and simple!

I gave this one to my Uncle George and Aunt Sadie.

I kept this one for myself!

I gave this one and a matching pillow to my mama for Mother's Day one year.

This one has been republished in a new DRG book called "The Joy of Thread."

This one is so easy you can almost do it with your eyes closed!

The same stitch pattern as the one above, but I added pineapples to the ends.
There are not as many publications buying afghan patterns anymore (at least not that I know of) but I have been thinking about adding a line of pretty afghans to my bellacrochet web site. I know they are one thing that crocheters will never get tired of making!

Tuesday, February 01, 2011

Writing a Workable Crochet Pattern: Part Three

Now we come to the most important part of writing a pattern- the actual instructions. As in the previous post, the original pattern is written in black and  my comments are in red.

Rnd 1: (remember to use Rnd or Row correctly. I always write them in bold print so that they will stand out from the rest of the pattern) With brown, (if you are using multiple colors in a pattern, tell them which one to use. The same goes if you are using more than one size of hook) ch 6, sl st in first ch to form ring, ch 2 (not worked in or counted as a stitch) (you can add extra information either in a Note section at the beginning of a pattern, or in italics and parenthesis within the pattern itself at the time it is needed. I use both methods) 2 dc cluster (see Special Stitches) in ring,  (it makes a Special Stitch more noticeable if you bold it the first time it is used in a pattern; you can then refer them to the Special Stitches for instructions) ch 3, (3 dc cluster -see Special Stitches- in ring, ch 3) 5 times, join with sl st in top of 2-dc cluster (on rnds, remember to tell them how and where to join). (One 2-dc cluster, five 3-dc clusters, 6 ch-3 sps made) (A stitch count helps the crocheter know that they have worked the correct number of stitches for the round. Stitch counts are the thing my customers have most often said they would like to see added to a pattern)
Rnd 2: (Sl st, ch 2, 2 dc cluster, ch 3, 3 dc cluster, ch 3) in first ch-3 sp, (whenever possible, list everything that is going on in a single stitch or space together inside parenthesis) (3 dc cluster, ch 3, 3 dc cluster, ch 3) (I try to write out the instructions as completely as possible, it makes the pattern a bit easier) in each ch-3 sp around, (this set of instructions could also be written "(3 dc cluster, ch 3) 2 times in each ch-3 sp around" but I like to write out a repeat if it is worked less than 3 times)  join with sl st in top of 2-dc cluster. (One 2-dc cluster, 11 3-dc clusters, 12 ch-3 sps made)

Rnd 3: (Sl st, ch 2, 2 dc cluster, ch 3, 3 dc cluster, ch 3) in first ch-3 sp, 3 dc cluster in next ch-3 sp, ch 3,
*(3 dc cluster, ch 3, 3 dc cluster, ch 3) in next ch-3 sp, 3 dc cluster in next ch-3 sp, ch 3; (when writing a repeat that starts with an asterisk, end the section to be repeated with a semi-colon) repeat from * around, join with sl st in top of 2 dc-cluster. Fasten off. (when changing colors, remember to tell them to fasten off the old color) (One 2-dc cluster, 17 3-dc clusters, 18 ch-3 sps made)

Rnd 4: Join green with sc in first ch-3 sp (when changing colors, tell them what color they are now using, where to join and what stitch to use to join), work 2 more sc in same ch-3 sp as joining,  (if working more stitches in the same space or stitch that you joined in, use the phrase "in the same st/sp as joining" to avoid confusion) work 3 sc in each ch-3 sp around, join with sl st in first sc. Fasten off. (54 sc made)

Rnd 5: Join yellow with sc in first sc, (ch 3, 3 dc) in same sc as joining, skip next 2 sc, *(sc, ch 3, 3 dc) in next sc, skip next 2 sc; repeat from * around, join with sl st in first sc. Fasten off.

Other things to remember and think about:
Always do a spell check!
Be consistent within the pattern. If you write "sc in each of next 3 dc" in one round, do not write "sc in next 3 sts" in the next. It might mean the same thing, but your customers will feel more comfortable with your patterns if they are written in a consistent manner.
Make sure you have numbered the row/rnds correctly. I have been known to go from Rnd 4 to Rnd 6 when writing a pattern; where Rnd 5 went is still a mystery, but your customers shouldn't have to try to figure out if it is just a numbering mistake on your part, or if a portion of the instructions are missing.
If you pattern has more than one piece (sleeves, pockets, collar, etc.) be sure you include the pattern for each.
Make sure the math works! This is such an important topic that I will be doing a follow up post on it in the future.
Do a little homework. If you have a favorite publisher or designer, someone who's patterns you enjoy working and find easy to follow, take one of their patterns and study the way it is written. You will quickly see how you can apply their style to your own patterns.
 
Did you ever dream there was so much to writing a crochet pattern? I trained for over 2 years in the Editorial department of Annie's Attic and I still didn't learn all there was to being a technical editor! We were told we must make the patterns easy enough so that a child could work them if they wanted to. Stay tuned for Part Four!